


This post is a collaboration with startcomposting.co.uk, our new website full of guides and tips to help get the nation composting!
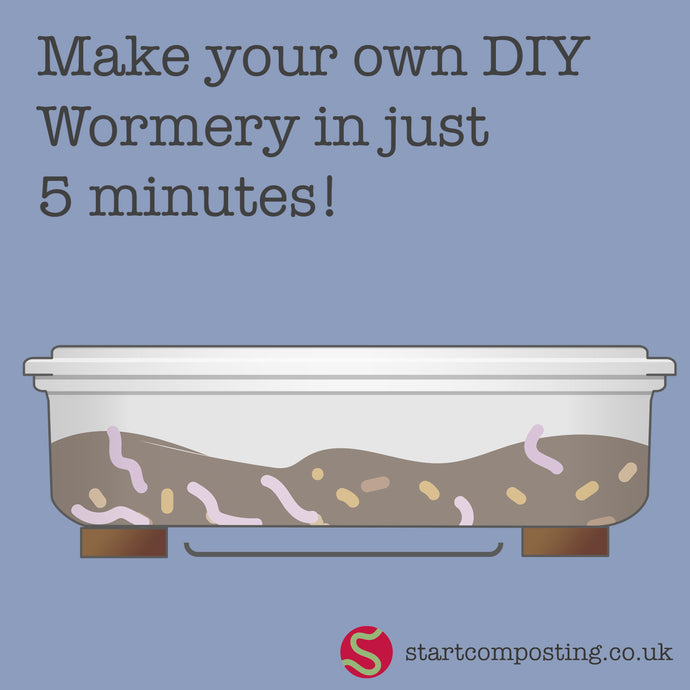
Worm composting, also known as vermiculture, is a natural and eco-friendly way to recycle your kitchen scraps and create nutrient-rich compost for your garden. It’s a simple and effective method that allows you to harness the power of earthworms to break down organic matter. In this article, we’ll delve into the world of worm composting and show you how to craft your very own wormery, a sustainable and budget-friendly solution for turning waste into garden gold.
Creating your own worm composter, also known as a vermicomposting bin, is a great way to recycle organic kitchen waste and create nutrient-rich worm castings for your garden. Here’s a step-by-step guide:
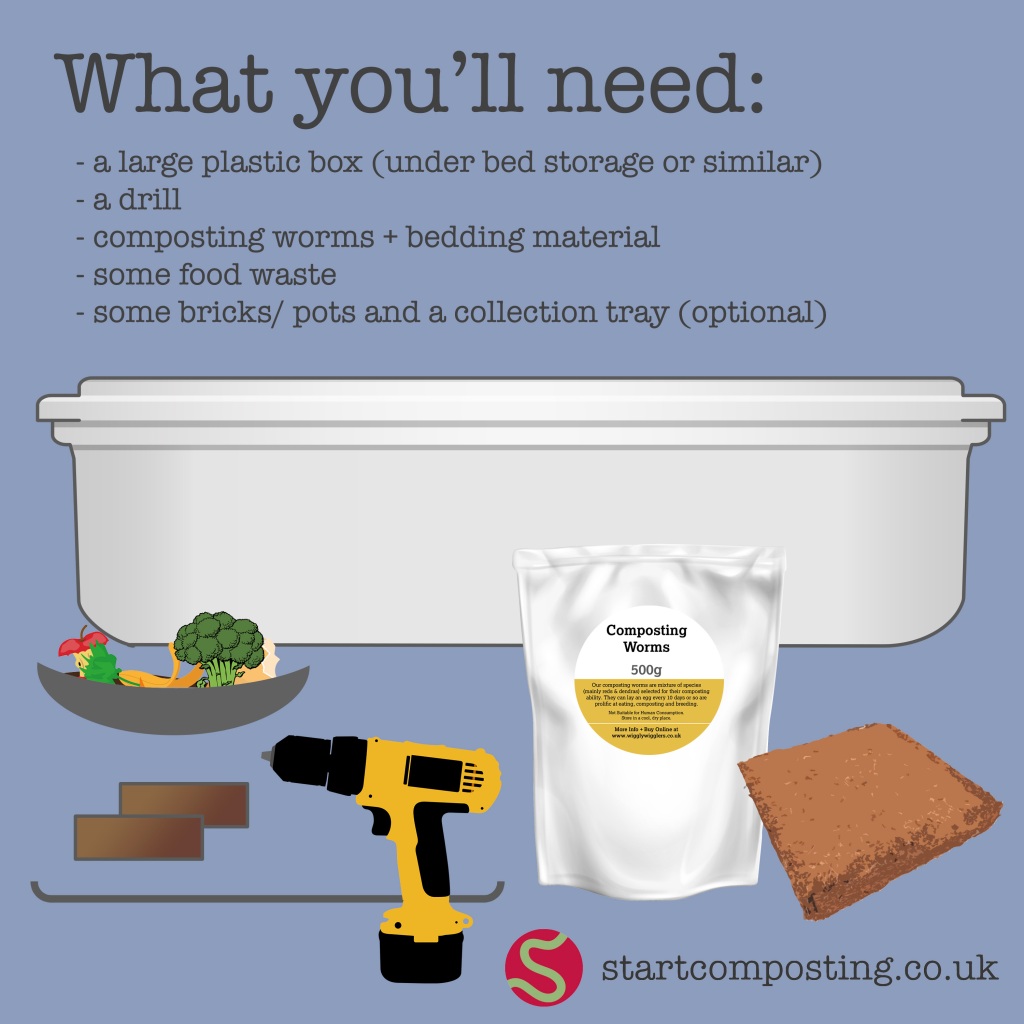
Materials you’ll need:
1. Plastic container (with a lid)
2. Drill and drill bits
3. Composting worms (order these from Wiggly Wigglers)
4. Bedding material (shredded newspaper, cardboard, or coconut coir)
5. Organic kitchen scraps (fruit and vegetable peelings, coffee grounds, etc.)
6. Water spray bottle
7. Bricks/ Pots and a collection tray (optional)
Steps:
1. Choose a Container:
- Select a container that is shallow and wide, rather than deep. A plastic storage bin with a lid works well. Make sure it has a lid to maintain moisture and temperature.
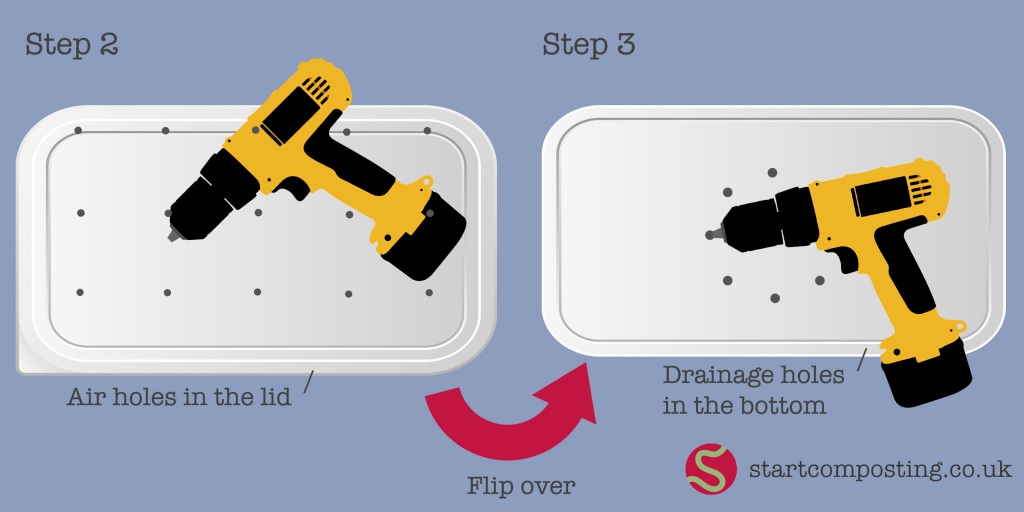
2. Drill Ventilation Holes:
- Drill small holes in the sides and near the top of the container to allow for air circulation.
3. Create a Drainage System:
- If your container doesn’t have a built-in drainage system, you can drill small holes in the bottom for excess liquid to escape. You can prop this up on bricks or pots and place a tray or something to catch the liquid under the bin.
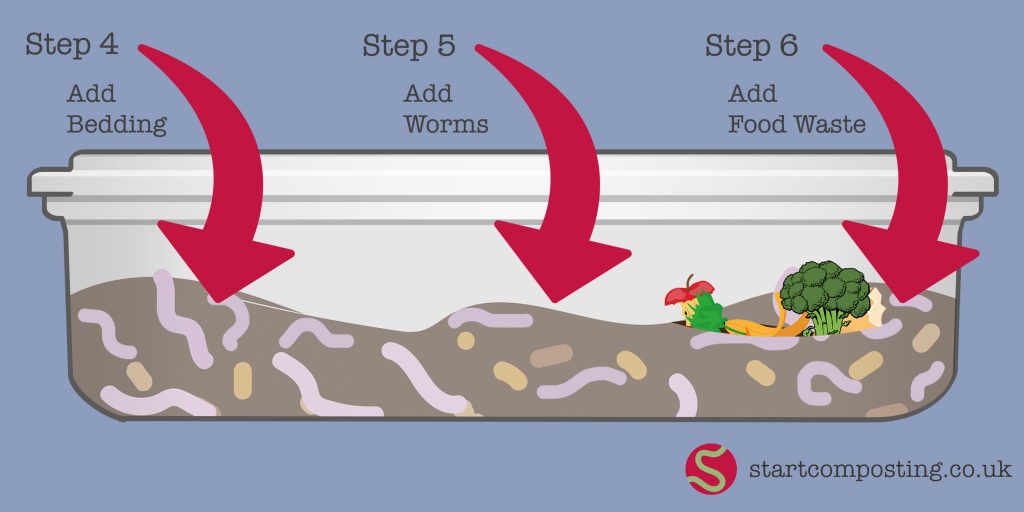
4. Add Bedding Material:
- Place a layer of bedding material (shredded newspaper, cardboard, or coconut coir) at the bottom of the container. Make it damp but not soaking wet.
5. Introduce Worms:
- Add your red wiggler worms to the bin. Start with about 500g of worms for a typical home-sized bin.
6. Provide Food:
- Add kitchen scraps, but avoid citrus, onions, and meats. Bury the scraps beneath the bedding to prevent fruit flies and odours.
7. Maintain Conditions:
- Keep the bedding moist, like a wrung-out sponge, by occasionally spraying with water. Worms need a moist environment to thrive.
8. Cover and Store:
- Place the lid on your bin to keep it dark, as worms prefer darkness. Store the bin in a cool, dark place, such as under the sink or in a closet.
9. Harvest the Compost:
- After a few months, the worms will convert the waste into worm castings (vermicompost). To harvest, push the contents of the bin to one side, add fresh bedding and food to the other side, and let the worms migrate to the new side. You can then remove the castings from the other side.
10. Use the Compost:
- Use the nutrient-rich vermicompost in your garden as a natural fertiliser. It’s an excellent source of plant nutrients.
Maintain your worm composter by regularly adding kitchen scraps, keeping the bedding moist, and harvesting the vermicompost when needed. With proper care, your worms will continue to produce rich compost for your gardening needs.
For more information about Worm Composting visit https://startcomposting.wordpress.com/worm-composting/
To order Composting Worms and Starter Kits visit https://www.wigglywigglers.co.uk/collections/live-worms
Illustrations from Vecteezy.com
#wormery #wormcomposting #vermicompost #compostingworms #greenliving #wigglywigglers #wigglyworms #weloveworms #worms #gardenworms #ecolife #compost #composting